Tuesday, February 24, 2015

Lets Talk Tuesday Recap

Hey there friends, I've had an exhausting few days consisting of working at a flower shop for the Valentines Day rush, lots of school board meetings, and not a whole lot of sleep. I apologize for not having a Lets Talk Tuesday post last week. I've had so many things going on and I've neglected my blog. I had planned to to do the full reveal of my little girlies scrapbooking themed birthday party but I haven't put the time into it that I feel like it needs. I'll get it finished up and posted soon.

Today, I'm going to link you to a few links to past Lets Talk Tuesday posts (similar to the recap that I shared, here) that you may have missed. Lets get started!

Not to long ago I posted the January Design Guide. I'm excited for this new series on my blog. The first design guide has gotten rave reviews. I can't wait to share February's Design Guide next week. In the mean time you can check out January's Design Guide that features this layout with the supply list, sketch, and step by step instructions for completing this project.
 Another popular Lets Talk Tuesday post is the "61 Everyday Page Titles" post. This post also includes a printable list. I'm always drawn to titles of layouts, the titles that others put on their layouts often inspire me to document my story that is similar to theirs. I hope this list will provide you with a little bit of inspiration.
http://beckiadams.blogspot.com/2014/06/lets-talk-tuesday-61-everyday-page.html
The very first Lets Talk Tuesday I did is still one of my very favorites. It's the one where I showed you several different projects about working with Lines. 
One of my favorite layouts is the one titled Mustache Smiles in the post "Using ALL of your letter stickers" 
Stay tuned for lots of fun stuff that I have coming up.
Have a happy Tuesday and a great week!

Thursday, February 12, 2015

Large Accordion Paper Flowers

Yesterday I shared with you the decorations for my daughters Scrapbooking themed birthday party. Today, I wanted to share with you a tutorial for creating those large accordion paper flowers. To make one 12 inch flower you'll need 2 pieces of 12x12 patterned paper, a glue gun , some adhesive , a paper trimmer , and a Scor-Pal .

  1.  cut 2 pieces of 12x12 paper in half so I had 4 pieces of paper measuring 6x12
  2. score all 4 pieces of paper at 1 inch
  3. accordion fold all 4 pieces of paper
  4. attach all 4 pieces of paper end to end to create a long strip
  5. attach the ends of the strip to create a circle
  6. push the circle down in the center and hold it tightly
  7. use a hot glue gun to adhere a piece of scrap paper to the back side of the flower to hold it all together
These large accordion paper flowers are so easy and fun to create. I can't wait to see what you will create with them.

 (This post contains affiliate links, by purchasing items through these links you will not pay more for any of the items I will just receive a small percentage of the sale. These affiliate links help to keep my blog running and to support my family.)

Wednesday, February 11, 2015

Scrapbooking Themed Party

My little girl is turning 10. Of course I'm having one of those "mommy moments" where I'm wondering where time has gone and how on earth she got to be 10. It really does seem like we just brought her home from the hospital. *sigh*

Last year we had a scrapbooking themed birthday party for her birthday, it was a huge hit. We set up a photo booth, took lots of photos, sent my hubby on a mad dash to 1-hour photo, and then each girl dove into my box of supplies that needed to find a new home. When the party was over each girl got to go home with a completed mini album. Last years party was such a success that we decided to do go with the same theme again this year. Over the next few days I'll tell you about the party and show you some of the details.

The decorations were the most fun and the most work (which isn't very much). My sister and I made tissue paper balls using this tutorial. They were really easy to make and not too time consuming (unless you're trying to make them with the help of 6 children).
The other two portions of this were so easy. I created large accordion paper flowers in about 10 minutes. (I'll have the tutorial for these flowers here tomorrow.)

To the pompoms and the accordion paper flowers I added the gold circle garland. It's brand new from Pebbles and 
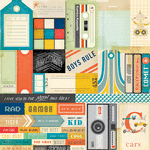
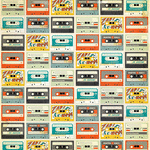
Tater Tots and Jello in the Cottage Living collection. I just laced it through the pom poms and accordion paper flowers. It gave the pom poms a little bit of shine. I should also add that the black and white happy birthday banner came from the same collection.

One of my favorite elements to these decorations are the gold painted frames. I simply (okay, really, I had my husband) spray paint a few frames that I got at the thrift store with gold spray paint .

He also painted a frame that I had used previously in my home that already had chicken wire attached to the back of it. I used that to showcase a few photos from last years party and a huge number 10 to show that my little girlie is celebrating her 10th birthday.

I'm so excited to share with you more details about the party in the next few days. Make sure to check back because I do have a fun giveaway to add to all the party ideas I'll share with you.

Have a happy Wednesday!
(This post contains affiliate links, by purchasing items through these links you will not pay more for any of the items I will just receive a small percentage of the sale. These affiliate links help to keep my blog running and to support my family.) 

Tuesday, February 10, 2015

Scrapbooking with Triangles

Scrapbooking with triangles is a hot trend right now. I struggle to follow a lot of trends and this is one of them. I do, however, like how this project turned out.
how to scrapbook using triangles by @jbckadams #scrapbooking #layout #scrapbook #papercrafting
The triangles on this project aren't as prominent as they are on some of the projects I've seen on Pinterest. I created these triangles by cutting patterned paper into 3 inch squares and then cutting them in half diagonally (from corner to corner).
how to scrapbook using triangles by @jbckadams #scrapbooking #layout #scrapbook #papercrafting
 To some of the triangles I added another smaller triangle. I created these triangles by cutting a 2 1/2 inch square and then cutting them in half on the diagonal (corner to corner).
how to scrapbook using triangles by @jbckadams #scrapbooking #layout #scrapbook #papercrafting
I added my journling in a few words scattered throughout the page using small black Thickers.

The title of this layout is "13." The journaling is simply a few of the things my son enjoys doing at the age of thirteen.
how to scrapbook using triangles by @jbckadams #scrapbooking #layout #scrapbook #papercrafting
When a "trend" is intriguing and inspiring to you, make it your own and make it work for you! I made the triangles trend work with my style, a little differently than others make it work but I love it.

I found a few examples of layouts created using triangles:
Snapshots of my girl by Heather Leopard
Memories by Nicole Nowosad
We are Made of Stories by Elizabeth Kartchner
Adrienne Alvis PSL Love (the second layout in this blog post)
Wonderful You by Mel Blackburn (the second layout in this blog post)

Is there a trend that you like but you're not sure how to incorporate it with your own style? Maybe something like scrapbooking with triangles?

Supplies:
(This post contains affiliate links, by purchasing items through these links you will not pay more for any of the items I will just receive a small percentage of the sale. These affiliate links help to keep my blog running and to support my family.)

Monday, February 9, 2015

Easy Handmade Valentines

Valentines Day is this week and it's not to late to create some easy handmade Valentines cards. I used to hate Valentines Day...until I had a sweet tiny baby girl the day before Valentines Day. She changed my whole outlook on the holiday! It's fun to have birthday to celebrate with all the pink and red hearts.

I have a few more Valentines to share with you that I created using the "We Go Together" collection from Pebbles. I used the 3x4 cut-a-part sheet to create both of these cards:
Easy Handmade Valentines by @jbckadams using supplies from @pebblesinc #cardmaking #handmadecards #Valentines
I cut out the sentiment portion for each of the cards.
Easy Handmade Valentines by @jbckadams using supplies from @pebblesinc #cardmaking #handmadecards #Valentines
I added a fancy doily under this sentiment card and added a few layers of patterned paper.
Easy Handmade Valentines by @jbckadams using supplies from @pebblesinc #cardmaking #handmadecards #Valentines
And this one just has a few layers of patterned paper.

Yes, there's still time to create your own easy handmade Valentines cards! :)

Supplies:


BLOGGER TEMPLATE BY DESIGNER BLOGS