(This post contains affiliate links. For more details check my disclosure page)
Hello, I'm excited to share with you a tutorial for an adorable card using the Silhouette Sketch Pens. and the Silhouette Cameo. This is the card I created:

Then I sent my card base through my Silhouette Cameo with a black pen.

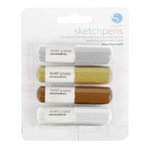
What I like about this technique is that you can use any color of pen or pencil to match the color of the embroidery floss you’d like to use for your hand stitching. For this card, I chose black.

After I had the lines drawn, I poked holes along each line with a paper piercer. I poked the holes about ¼ to ⅛ inch apart.

Then, I stitched all the way around the word “love” with black embroidery floss.

After I finished stitching I added a couple of small embellishments, a couple of strips of patterned paper, and a sticker to finish the card.

I love adding hand stitched elements to my paper crafting projects. It adds a personal handmade touch to any project.

Using the Silhouette and the sketch pens makes hand stitching that much easier.

I hope you love your Silhouette as much as I do? What is your favorite project using the Silhouette?


No comments:
Post a Comment